Beginner’s Guide to Charcoal Drawing and Sketching

by Steve Mason

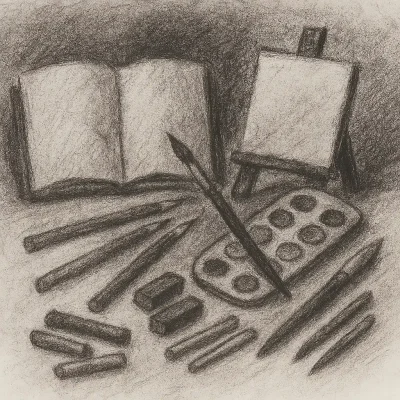
charcoal sketch

Charcoal has always been one of my favourite drawing materials. It’s direct, expressive, and wonderfully unpredictable — a medium that captures both bold gestures and delicate subtleties with equal ease. From quick life studies to detailed tonal work, charcoal encourages you to think in shapes, light, and movement rather than rigid outlines.

In this guide, I’ll share what I’ve learned from using charcoal in my own studio — the types of charcoal available, the papers and tools that make a difference, and the techniques that bring drawings to life. Whether you’re sketching for relaxation or building the foundations of a painting, this guide will help you start with confidence and curiosity.

“Charcoal rewards boldness. The more freely you work, the more alive your drawing becomes.”
Table of Contents

Understanding Charcoal

Charcoal is essentially burnt wood — simple, ancient, and beautifully tactile. Yet the way it behaves on paper depends entirely on its form and composition.

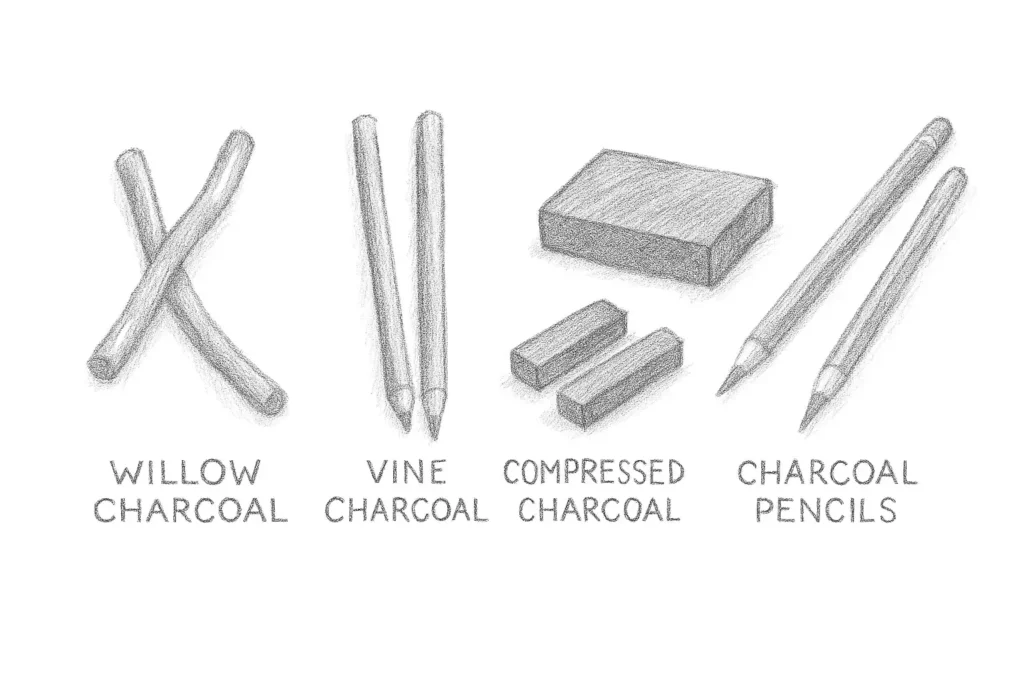
Willow Charcoal

Made from natural willow branches burnt without air, this is the softest and most forgiving type. It’s perfect for sketching, gestural work, and laying down tonal foundations. It erases easily, so you can build, lift, and reshape forms without damaging the paper.

Best for: Life drawing, quick sketches, loose tonal work
Popular brands: Winsor & Newton, Derwent, Coates

Vine Charcoal

Similar to willow but slightly firmer and darker, vine charcoal gives a smoother, more controlled line. Ideal for artists who want more definition in their marks.

Compressed Charcoal

Powdered charcoal bound with gum or wax, producing deep, rich blacks. It’s much harder to erase but perfect for bold contrasts and strong line work.

Best for: Finished drawings, deep shadows, dramatic tonal range
Popular brands: General’s, Cretacolor, Derwent

Charcoal Pencils

Charcoal in pencil form gives you precision and less mess. Great for details, outlines, or combining with softer sticks for texture.

Best for: Controlled drawing, mixed-media work
Recommended brands: Faber-Castell Pitt, Derwent Charcoal Pencils

Choosing the Right Paper

Charcoal needs tooth — a slightly rough surface that grips the pigment. Smooth paper can’t hold layers, while overly rough paper makes fine detail difficult.

Good All-Round Choices:

  • Canson Mi-Teintes (160gsm) – available in neutral and toned shades
  • Strathmore 400 Series Charcoal Paper – excellent for both willow and compressed charcoal
  • Daler-Rowney Ingres – lightweight and ideal for sketchbooks

If you like blending and layering, choose heavier paper (180gsm or above). For sketching on the go, a spiral-bound pad with a bit of texture works well.

Pro tip: Experiment with toned papers — mid-greys or browns let you work in both directions, adding shadows with charcoal and highlights with white chalk or pastel.

Essential Tools & Accessories

Erasers

  • Kneaded eraser: Soft, pliable, perfect for lifting charcoal without damaging paper.
  • Plastic eraser: For sharp highlights and precise removal.

Blending Tools

  • Tortillons (paper stumps): Great for smooth shading and gradients.
  • Soft cloths or tissues: For larger, diffused areas.
  • Your fingers: A classic tool — just remember natural oils can darken paper.

Fixatives

Charcoal smudges easily, so a light fixative spray helps protect finished drawings.

  • Recommended: Winsor & Newton Artists’ Fixative or Lascaux Fine Art Fixative
  • Always spray lightly from 30–40 cm away in a ventilated area.

Other Essentials

  • Drawing board and clips – keep your paper flat and stable
  • Charcoal holder – for clean handling and extended reach
  • White chalk or pastel pencil – for highlights on toned paper

Basic Techniques

Line and Contour

Start with loose, confident lines. Don’t aim for perfection — think of the line as a path of discovery. Hold your charcoal stick further back for freedom and broader movement.

Blocking and Tone

Work from general to specific. Begin by blocking in large shapes of shadow and light using the side of your charcoal, then refine details gradually.

Blending

Softly blend tones with a tortillon, tissue, or your finger. Avoid over-blending — leaving visible strokes keeps the drawing lively.

Lifting and Erasing

Use your kneaded eraser to pull light out of dark areas, creating highlights and definition. You can even “draw” with the eraser for expressive textures.

Cross-Hatching and Texture

For more structure, use cross-hatching with a charcoal pencil. Try varying your pressure to create depth and rhythm in the marks.

Practice Exercises

Here are a few exercises I often return to — they sharpen observation and loosen the hand:

  1. Value Scales: Create a gradient from black to white using only charcoal pressure.
  2. Still Life Shadows: Draw a simple object using only tone — no outlines.
  3. Gesture Studies: 30-second sketches of figures or animals to capture movement.
  4. Negative Space Drawing: Focus only on the shapes around your subject.
  5. Tonal Portrait: Use willow charcoal for mid-tones, compressed for shadows, and white chalk for highlights.


These quick studies teach you to see light, not just shape — the essence of all drawing.

Common Mistakes (and How to Avoid Them)

  • Overblending: Creates flat, muddy tones. Keep some edges sharp.
  • Too much detail too soon: Build the whole drawing gradually.
  • Forgetting to fix: Charcoal can vanish with one careless touch — fix your work in stages.
  • Pressing too hard: Flattens the paper and limits future layers.


Ignoring the whole composition: Step back regularly and check balance and proportion

Final Thoughts

Charcoal is both ancient and endlessly fresh. It allows for subtlety and drama in equal measure, encouraging freedom and directness in mark-making. The best way to learn is by doing — fill sketchbooks, make a mess, and enjoy the process of discovery.

Once you grow comfortable, you’ll find charcoal invaluable not only as a medium in its own right but also as a foundation for painting. Many of my favourite oil and acrylic works began as loose charcoal sketches.

“Every mark you make in charcoal teaches you something about seeing — and about yourself as an artist.”

Frequently Asked Questions

Beginner’s Guide to Charcoal Drawing and Sketching

1 — What charcoal is best for beginners?
Start with willow charcoal and a charcoal pencil. Willow is easy to erase and great for learning tonal work, while pencils help with sharper lines.

2 — Can I use any paper for charcoal drawing?
You can, but smooth printer paper won’t hold much charcoal. Choose paper with tooth (texture), such as cartridge or charcoal pads, ideally 180gsm or above.

3 — How do I keep charcoal drawings from smudging?
Use a fixative spray lightly and gradually. Always spray in short bursts and allow layers to dry between applications.

4 — What tools do I need to start charcoal drawing?
At minimum:

  • Willow charcoal
  • Kneaded eraser
  • Blending stump or tissue
  • Textured paper or a sketch pad

Everything else is a bonus until you build confidence.

5 — Why does my charcoal drawing look muddy?
Overblending is the usual culprit. Leave some marks crisp and build contrast by reinforcing your darkest shadows.

6 — How do I draw fine details with charcoal?
Use a sharpened charcoal pencil or the pointed edge of a compressed stick. Keep details near focal points — not everywhere.

7 — Do I need to wear gloves?
Not required, but charcoal can mark skin easily. If you blend with fingers, be aware that natural oils can darken the paper unintentionally.

8 — Can charcoal be combined with other media?
Yes! Charcoal pairs beautifully with:

  • White chalk or pastel for highlights
  • Ink for dramatic contrast
  • Acrylic or oil underpainting (when fixed properly)

Mixed-media experimentation is encouraged — just apply wet media last.

9 — What’s the difference between charcoal and graphite?
Graphite is smoother and reflective; charcoal is darker and more matte, better for dramatic tones and expressive mark-making.

10 — What’s the quickest way to improve my charcoal drawings?
Practice gesture drawing and tonal studies regularly. The more you focus on light rather than lines, the faster your skills will grow.